Antipyretics for children are prescribed by a pediatrician. But there are situations of emergency care for fever, when the child needs to give the medicine immediately. Then the parents take responsibility and apply antipyretic drugs. What is allowed to give to infants? How can you bring down the temperature in older children? Which medications are the safest?
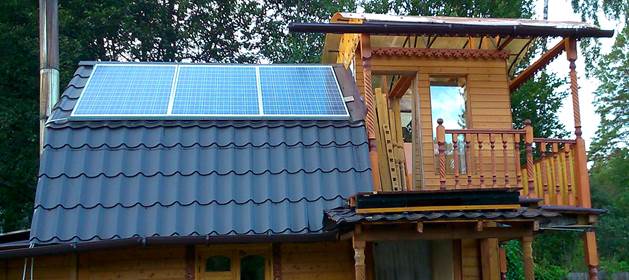
In the course of scientific and technological progress, people have learned to rationally manage the resources of nature and receive renewable energy from the sun, water or wind. Today in a "smart" house or apartment to reduce the cost of utilities are often installed solar panels. They produce energy, absorbing the sun's rays.
Especially relevant is the adaptation in areas with a large number of sunny days per year and a hot climate. However, in Russia the complex solar panels often put on buildings because of its environmental friendliness and the possibility of creating a single power supply complex.
To ensure the uninterrupted supply of energy to a small family, you will need to buy panels with an area of 15-20 square meters. m. One of its square meter on the house can give energy at 120 watts. In the month there should be about 20 clear days, and the roof area of the house is at least 40 square meters. m. The cost of the whole complex, according to reviews, pays off already in the first few years.
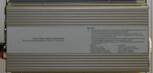
 Solar power station HR950 / v 2.0
 The device of solar cells
The solar battery assumes the transformation of solar radiation into the electricity necessary for mankind. It will be very profitable both in a private building and in office buildings.
All the batteries are made of solar cells. They are semiconductors - a pair of silicon wafers that join together. Adding impurities to the silicon to obtain the desired properties of the structure. For example, one plate will have in excess valence electrons, and the second will have their deficiency. Thus, the semiconductor layer will receive negatively and positively charged particles. The boundary, where the elements are in contact, contains a blocking layer that prevents the transition of an excess of electrons.
When the power supply is connected from outside, the electrons will overcome the fault zone, and the conductor will conduct the current. Something similar happens when the solar cell of the battery is powered by the sun's energy. If a photon hits the surface of the structure, energy will be transferred from it to the released electrons. And the place of the appearance of the so-called hole will move electrons from the second part of the conductor.
 The device and principle of operation of the solar battery
 Accordingly, the current that an element can create will be different depending on the number of photons that hit its surface. The number of photons incident on the surface, in turn, depends on:
- the area of the battery;
- intensity of sunlight;
- period of use;
- coefficient of construction efficiency;
- temperature (if it is significantly increased, the conductivity of the structure is reduced).
The power of sunlight, per 1 sq. Km. m., is about 1350 watts. The higher the battery power for a smart apartment or home, the more electricity it produces. However, the cost of it will be higher.
Despite the fact that the feedback about installed purchased batteries is positive, many want to reduce the cost of panels by assembling devices to convert sunlight themselves. This is quite a labor-intensive process, and the best option is to purchase a ready-made kit.
Varieties
Solar panels on the house can be:
- autonomous. Provide for the absence of a centralized power supply network and do not assume its further connection;
- combined. They are used in parallel with the traditional electricity network because of cost savings or environmental friendliness.
In addition, batteries for converting solar radiation depending on power and cost are divided into:
- designs with low power. They are enough to charge the smartphone, as well as to power many electronic devices. However, they are rarely chosen because of the not very favorable ratio between capacity and price;
- universal devices. They are more popular among smart home owners, since not only help to provide energy for the operation of several devices, but also have an unusual appearance. Often bought for use in the field or tourists;
- solar panels. They represent photographic plates, which are fixed on an ad-hoc basis. Mounted on the roof and in sunny weather. Judging by the reviews, they can meet the demand for electricity 100%.
 Solar panels for solar power station
 Regardless of the variety, the panel set for the apartment or "smart" house will include:
- inverter for voltage conversion;
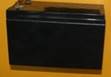
- battery. Used to accumulate sunlight;
- device for controlling the charge.
 A set of solar power plant with a peak power of 3 kW
 Assembly and connection diagram
The solar power plant with its own hands is going this way:
- Find the output terminals of the charge controller, connect the battery to it. After that, the conductors that are moving away from each panel are connected to the input terminal of the device for controlling the charge. If a cable is included with the panels, this step is not needed.
- Connect the conductors required by the scheme "+" to "+", and also "-" to "-". After that, the terminals located at the input of the inverter are supplied with power from the battery.
- By turning on the controller for the charge and the inverter, you will see that the electricity that will start to produce the panel will charge the battery.
To determine the polarity of the outputs in the solar energy conversion panels, you only need to measure the voltage in the terminals using a multimeter. If there is no minus sign near the digits of the voltage value, the black probe of the device will correspond to the negative terminal, and vice versa.
 The scheme of connection of solar panels and household load
 Installation rules
Installation of solar radiation converters should be carried out, adhering to the following rules:
- Install the elements on the most illuminated place of the roof of the "smart" house, which will not be at any time of the day is under the shadow of trees or roofs of other buildings. It is possible to install panels on walls or supports that are placed directly on the ground.
- In order for the panel to produce the maximum amount of energy, observe the required azimuth and angle of inclination. For example, for the Northern Hemisphere the required azimuth is 180 degrees strictly to the south. At the same time, the angle to which the structure should be tilted depends on the latitude of the location of your settlement (for example, for St. Petersburg this figure is 60 degrees: 0 degrees horizontally and 90 degrees vertically). In summer, you can increase the slope, and in winter - reduce by 10 degrees. There are many calculators that reflect the dependence of the amount of energy produced from the azimuth or the magnitude of the slope.
 Installation of solar panels
 - In winter, snow falling on solar cells will prevent further generation of electricity. Therefore, it is important to remove it from the surface in time or install the panels under a big slope.
- If you install a large number of panels in multiple rows on the roof of a smart house, observe the distance between them (at least 1.7 rows in height) to prevent the creation of a shadow from the modules.
- All components for installation are supplied. The profile of each component of aluminum has several fastening holes for a variety of variations of fastening elements.
A couple of decades ago, solar power stations for the home were seen as something of a fantasy field. Now this direction is actively developing and nobody surprises. Despite a decent price, such energy carriers are in demand, since they allow you to save and create your own autonomous source energy. Let's consider features of these installations, their manufacturing and installation by own hands.
Features
Solar power stations for the house in the package are advantageous in that they do not require additional calculations. The design is provided in ready-made form with a certain output power, which must be properly selected during installation. Such systems cost an order of magnitude more expensive than similar components separately, but do not require much effort during installation. In any case, you have to choose between several modifications.
It is better to do this with knowledge of the matter, not trusting blindly the seller. When choosing a solar power station for a house, it is necessary to take into account not so many factors. In general, there are four main aspects. Below we consider these indicators in more detail.
Power and type of panels
Determining the power indicator is quite simple. It is calculated taking into account the most powerful consumer in the home (rarely household appliances consume more than 3 kW). To the selected value a small stock is added, the required indicator is ready. If you take a clear example, then on a sunny day you can turn on the washing machine and refrigerator. As a result, for a small house enough power plant with an output power of about 3 kW.

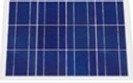
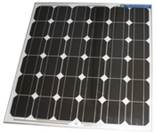
The second criterion for choosing a solar power plant for a private house is the type of panels. Three types of modern designs are known: film, monocrystalline and polycrystalline models. The weakest in quality is considered the film version, it gradually leaves the market. The choice between mono and polycrystalline panels depends on the average cloudiness of the region. The second modification in conditions of weak sunlight works more effectively.
Inverter and controller
The next element, which is worth paying attention to when choosing solar power for home, is the inverter. The device is designed to increase the voltage of 6, 12 or 24 volts, which produce standard panels. The output is the usual value of 220 volts. The choice of this device is affected by two main factors:
- Power. It should be able to withstand the required load with a margin.
- Type of output signal.
To avoid damage to household appliances, you must choose panels with a clean, rather than a modified sinusoid at the output.
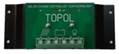
Another working element of the design is the controller. The device distributes electricity and monitors the charging of the batteries. If there is no direct distribution of electricity from the panels or all the energy is involved, the controller gives a charge to the batteries. In case of shortage of solar energy, the device takes energy from the tanks. In fact, the device does a monotonous but important job, without which the whole system can not work.
![]()
How to make a solar power plant home with your own hands?
For self-construction, the above materials and some additional devices (special wiring with connectors and connectors, helium storage batteries, mounting parts) will be required.
Assembly of a homemade solar station begins with the installation of installation elements. They are a rigid frame from a profile pipe. The design of this part depends on the installation site, but the general configuration has a standard layout. Represents a rectangular element, with special clamping devices attached to it with a rubber cushion. The design can be assembled directly on the roof or on the ground.
Main Stage
At the next stage of the construction of an autonomous solar power plant for the house, it will be necessary to fix the panels. There is nothing complicated in this. Each element is fixed with screws. The main thing is not to show excessive zeal to not deform the panel.

Then, the fixed parts are switched to a single circuit. For this, the panel elements are connected in series. At the fixing points, tees with connectors are installed. It must be remembered that after sunlight penetrates, the design begins to generate energy. To avoid injury by a current discharge, the assembly sequence must be strictly followed. The connection starts from the controller, and before it is mounted the circuit-breaker. First of all, the main trunk is laid with the installation of tees in the required places. Only after completion of these works, short cables with connectors are mounted, through which panels are connected to tees.
Final work
At the final stage of installing a solar power plant for the home, a battery pack is connected to the controller. The more of them in a bundle, the better (this will make a significant energy reserve). Batteries should be purchased special (automotive low-capacity analogs are not suitable). They are electrical tanks with a volume of at least 150 A / h. Optimum option will be helium models, which are connected together in parallel. By connecting with each other plus plus and minus with a minus, you can save the voltage, while the total capacity will increase.

Next, the inverter is connected directly to the batteries by the same principle. Otherwise, the element will not function. The inverter output with a voltage of 220 volts is connected through a switch-automaton to the home network. This is the whole process of creating a solar power station for a house (6 kW). The main thing is to plan the process correctly and to understand the principle of the design.
It should be noted that for the present in the domestic space, the calculation of the profitability of the energy sources under consideration is not very bright. If surplus energy is not sold to neighbors at an adequate price, the system does not fully pay off. The classical form of supply of unused energy to the city network for a penny does not bring any positive results.
The state does not prohibit the use of ready-made solar power stations for home, although it does not encourage it at all. For this reason, the installation of such structures is optimal where there is no grid electricity at all.

The described actions for the installation and assembly of a solar power plant are sufficient to correctly select the appropriate modification. In addition, you can save money if you perform the assembly yourself from separate parts. Power calculations are also not a problem. In extreme cases, you can hire a specialist who at a moderate fee will make all the drawings and schemes.
Solar power stations for home: reviews
As evidenced by the owners' responses, solar power plants are easy to install. They can be installed not only on the roof, but also on the walls from the sunny side. For a couple of days the whole construction can be assembled and mounted by one person. The kit includes fastening hardware, which allows the panels to be mounted in various positions.
If the energy input system is mixed (network plus solar option), note the sockets and appliances that operate from the panels, and in a month calculate the savings. As the owners say, despite the fact that first it is necessary to invest decently in the project financially, the result will not take long to wait, taking into account the fact that the autonomous energy does not need to be paid. On the contrary, it can be sold.

Consumers note that if the batteries for the energy reserve are not enough, do not rush to completely abandon the central connection. Since the resource of solar stations is not less than 20 years, the payback will be substantial, albeit long-term.
Interest in alternative energy systems increases from year to year. The possibility of free electricity from natural sources - modern look power consumption. Along with wind power plants, solar power stations for the home are widely used. A distinctive feature of these devices are photocells that capture the energy of the sun's rays.
Device of solar system
In addition to them, the design may include additional components: solar collectors, backup generators, charge controllers and other components.
Connection diagram
- Modules that capture the energy of the sun's rays;
- Accumulators for accumulation of energy;
- Inverters that convert current into alternating current;
Solar modules are the main component of the solar system, they capture radiation impulses and convert them into electricity. The choice of a particular module depends on the power it produces.
Inverters give the current produced variable frequency, which is necessary for consumption by household appliances. Energy accumulators that perform the function of a storage system create conditions for the independence of the power supply under any weather conditions.
Browse popular models

Solar power station
- Power: 2 400 W;
- Power at peak: 5,000 Watts;
- Power of photocells: 480 W;
- Photocell type: polycrystalline;
- Battery capacity: 400 A / h;
- Battery type: GEL.
These solar autonomous power stations for the house provide facilities that are not connected to central networks, clean energy. Efficiency - from 3,6 kW / hour daily, regardless of the cloudy weather. The solar system is easy to set up and guaranteed for a long time: photocells - up to 26 years, batteries - up to 10 years. In the configuration - two photo panels, an inverter with a controller, two gel batteries, a set of wires and a shield. The price of a solar autonomous power station for a house is 104,543 rubles.
Solar station Geleomaster
- Power: 1 - 10 kW;
- Output voltage: 220 V;
- Power of photocells: 150 W;
- Battery capacity: 150 A / h;
- Battery type: GEL;
- The price: 38 560 rubles.
This solar energy system accumulates energy during the daytime and distributes it according to the set parameters of the controller. Also, the controller monitors the level of filling of the batteries and does not allow their full discharge. A feature of modern solar power plants is the accumulation of solar energy even in winter and rainy time.

Products Garden Smart
Station Garden (Smart)
- Power: 6 kW;
- Photocells: 600 W;
- Battery capacity: 1300 W / h;
- Battery type: GEL;
- The price: 36 360 rubles.
This solar station is designed to power the energy of garden houses and provide lighting areas. The strength of the device is enough to charge computer equipment, a refrigerator, light devices, telephones and televisions. You can also connect garden power tools, pumps and other equipment. Peak power - up to 900 Watts. In winter the station generates about 500 kW / h, and in the summer it will provide up to 1,500 kW / hr.
How to choose a reliable power station for your home
What to look for when choosing the right power plant:
- You should know the indicator of the maximum consumed energy by household appliances at the same time, taking into account the increase in starting capacity. In accordance with this, the type of photovoltaic cells of the power plant is selected.
- You must calculate the maximum daily load of energy consumption (in W / h).
- When choosing prefabricated solar power plants, account should be taken of the time of use of the unit: year-round or seasonally.
- Also, you should ask the local weather service in advance about the average and average monthly helio activity.
- The choice of photocells depends on the total energy consumption.
- When choosing batteries after calculating the solar power station for the house, pay attention to the low self-discharge indicator: the module should save energy for at least four days. The most suitable are the GEL batteries. Their feature is unpretentiousness in difficult operating conditions. They are less exposed to adverse events than AGM batteries.
- The choice of inverter depends on the number of devices with a high starting capacity. If there are many such instruments, then a sinusoidal inverter should be selected, and the inverter power must cover the starting power of the devices. Let's say that one-moment power consumption is 600 W at a maximum starting voltage of 2,000 W, therefore, you select an inverter with a constant value of 650 W and a starting one - more than 2,000 W.
- For the right choice controller, it is necessary to divide the power of the photocells (batteries) by the voltage of the batteries. In this case, we get the maximum indicator of the charging operating current that the controller must withstand.
In order to ensure safe operation of solar power plants, it is recommended to purchase double-insulated cables. It will not hurt to purchase the option of a protective trip in emergency situations and the current switches in the constant / variable mode.
Necessary calculations
To provide all household electrical appliances with energy, it is necessary to calculate the solar power plant. The total power of current consumption by devices should not exceed the amount of energy generated by the generator.
Watch video, features of power plant selection:
Make a list of all energy consumers in your home, and indicate their capacity.
When calculating, account should be taken of the starting value of electrical engineering. At start of some devices (the compressor, a refrigerator) starting capacity exceeds nominal in five-six times. To save energy, do not allow one-step switch-on of devices with a high starting value.
Find out how much time your electrical appliances work. After that, determine the average energy consumption per day. To do this, multiply the nominal power of the electrical appliance by the working time. For example, 100 W x 3 hours = 300 W / h. It turns out that the device consumes 300 watts of energy per day. Then add up all the indicators, and you will get an average daily electricity consumption.
Watch the video, make the calculation of the system:
Find out in the local meteorological center about the average amount of solar energy that you can count on when working at home solar power plant. You need data on the average annual and monthly average helium activity, namely, the lowest of its indicators. The average annual figures will allow you to determine the approximate monthly energy consumption.
Now you need to determine how many photo modules you need. To do this, divide the energy consumption indicator by the output power of the photo module. If the module's power does not cover the required power consumption, you need to purchase two or three batteries. When buying a solar power station for your home, consider that its power must cover the need for energy.
Mounting Features
When installing heliostation, the presence of photocells must be taken into account. Batteries must be installed in such a way that they are exposed to the sun's rays at a right angle. In this case, you will increase the efficiency of the power plant. Angle of deviation from the perpendicular should not exceed the mark of + 15%, taking into account the displacement of the solar disk.
For the year-round use of heliostation, the angle of deviation is determined by the position of latitude. In the summer, it is necessary to move the deflection angle to the "minus 15%" mark to the latitude.
The result
The choice and installation of a solar power station for a home is better to entrust to professionals. For better performance, some knowledge is required, otherwise the system will not work qualitatively. The acquisition of a photovoltaic system should be consistent with the level of energy consumption in a particular case. The expert will help you to make the necessary calculations.
I decided to present to your attention an article about how, how to do it solar power plant own hands.
The design is different from similar power plants improved electronic stuffing:
- batteries have a large capacity;
- effective charge controller;
- improved electrical safety;
- more outlets;
- digital displays show the amount of electricity consumed and generated.
If you want to manufacture a power plant or you are just interested in the structure of this device, then this article will be of interest to you.
Step 1: What is necessary in order to build such a system

The first thing to do when starting the project planning is decide on, which power you want to get from the system. Provide electricity to the whole house, it would be wonderful, but then this system will be expensive and lose its mobility. My power plant can provide energy only a small LCD TV, a pair of 12 watts energy saving light bulbs, a digital receiver, a CD player and a radio. It is also possible to charge mobile phones and other low-power devices.

It is very important to determine the prices for the components that will be used in the project. I wanted to do everything as best, so I decided on the PS-30M 30 Amp Morningstar Charge.
This charge controller uses a pulse-width modulator to gently recharge the battery after the system is fully charged.
For the battery pack was purchased two Trojan T-105, in one 6 V, and the total voltage 12 V and 225 Ah. The capacity of the battery is huge and sufficient to power more electrical appliances.
The importance of selecting the main elements of the system is that their parameters are necessary for calculating the amount of generated energy. LCD TV and receiver consume 2.2A direct current at 12 V, energy-efficient lighting consumes only 1 A for a 12 watt bulb. While the phone / GPS consumes fewer energy at the time of charging.
Using the TV for 3 hours a day, it will consume 6.6 Ah. Lighting for 4-5 hours consumes up to 4 Ah, while charging portable devices will pull by 2 Ah. The total value will be 12.6 Ah. The charge of the deep cycle battery should not fall below 50% of full capacity. To prolong the battery life in operation, a smaller discharge cycle should be used. Therefore, a battery with 30Ah will be enough.
In my region on earth, sunlight falls during 6 hours. Therefore, to restore the battery charge, it takes 50 watts from the solar panels and approximately 5 hours of solar activity.
Using the power formula W = B * A, calculate the average value of the current from the solar panel at maximum power 50 W / 17 V = 2.94 A
In order to charge batteries when using solar panels, you need to spend 13 Ah / 2.94 A = 4.76 hours of direct sunlight.
In the real world, everything will be different:
- The panels are covered with protective coatings;
- Overcast;
- Battery temperature;
- Wire cross-section;
- Length of the wiring;
- Other losses.

Therefore, it is more efficient to use a battery with a large capacitive charge. In this case, you can use this system several times, without consequences for its elements, if the weather conditions for the next day will not be suitable for efficient charging using solar panels. 225 Ah will suffice with a surplus, but it is better to have more than necessary.
Step 2: Plan the project


The next step is to plan how the project will look. Experimenting with the design options of the installation, various designs were developed. For the design use Microsoft Word. This will help understand the alignment of components and exhibit design aspects that will not be functional.


Two Turnigy wattmeter, which are most often used in air modeling. These indicators with intelligence show voltage, amperage, watt-hours, ampere-hours, minimum voltage and maximum current consumption that are ideal for use in the solar panel system. Using one device it will be possible to control how many watts of energy and how many ampere hours a day the solar panels produce, and the other how many watts are used and what capacitive charge remains in the batteries.


After different options by the arrangement of elements that are mounted in separate compartments, external and internal storage batteries, wide and narrow installations, an option was adopted with an inclined instrument panel, a vertically mounted charge controller and a separate battery unit for easy transportation.

Step 3: Make the battery cover


The first step will be the creation of an external battery pack. For construction was used 12 mm chipboard, the total weight of the structure, together with the batteries, was 56 kg. Rollers and knobs are installed to move the installation.
![]()


Having the dimensions of the installation, we will draw a large sheet of chipboard. Then we cut out the elements of the thumbs and collect them, as shown in the pictures.


Step 4: The main unit


After the battery pack was assembled, it's time to build the main part. Repeat the procedure: a large sheet of EAF mark it in size. Cut everything out with a saw on a tree.


This is the easiest way to cut long straight lines. Thus, a large piece of chipboard is broken into smaller pieces, which are easy to control. After using the saw on the wood, it is necessary to use sandpaper for deburring.

Instead of a saw, you can use electric jigsaw, with it the work will go faster and easier, but the lines from the jig saw can be not so smooth.

After all the panel elements are cut out, it is necessary to check the correspondence of the sizes and shapes to the developed plan-model. For the frame of the device we use bars 20 * 20 mm, we will use them to connect them 30 mm screws.

After the completion of the basic design, we proceed to the installation of electronic components. First install the connectors on the front panel, as they are easier to install. Connect two sockets for plugs and three for car charger, which are most suitable for powering devices directly from 12 V.
The next thing we connect:
- Switches;
- Radio;
- Charge controllers;
- Counters.
The counters supplied by Turnigy are enclosed in a plastic casing, which is easily removed by twisting four small screws. The LCD displays of the meters are soldered directly to the board, which means that you do not have to bother with soldering the cable from the display to the pads on the chip.

For protective displays of meters we will use 3 mm plexiglas. To cut it, you can use knife or saw by metal. The protective glass frames are mounted on the front panel and fixed using a hot hot glue.
The project uses chrome-plated metal switches with two operating positions. Colorful LED rings illuminate the 12 V socket charging.
The charge controller is simply bolted to the rear panel with bolts. The most expensive element of the project are batteries, so they need special care.
The back of the unit acts as the basis for a variety of ports, eight radio inputs / outputs, including four acoustic outputs, two preamp outputs, one microphone input and one subwoofer output.
To be continued…
Autonomous power plants using solar energy
LLC "Solar Technologies" develops, manufactures and supplies energy-efficient autonomous complexes using renewable energy sources - solar energy. Open Company "Solar technologies" carries out design works and provides warranty and post-warranty service.
The electrical power of the complexes can be from hundreds of W to tens of kW. The complexes have built-in programmable microprocessors and can be supplemented with a remote control system, diagnostics and work together with specialized equipment.
Purpose of the complex:
Security intrasubject house and street lighting.
|
The complexes include: a) photoelectric converters (solar panels); b) controller (discharge / charge); c) energy storage (battery); d) an inverter; d ) control cabinet. Typical specifications basic complex:
Life time: - solar photovoltaic cells 20 - 25 years; - power electronics 12-15 years; - energy storage (battery) 10 - 12 years; - lighting - 10 -15 years. |
If you visit the dacha in the spring-summer period, the use of solar batteries seems more rational. Solar activity is highest.
Let's give some examples.
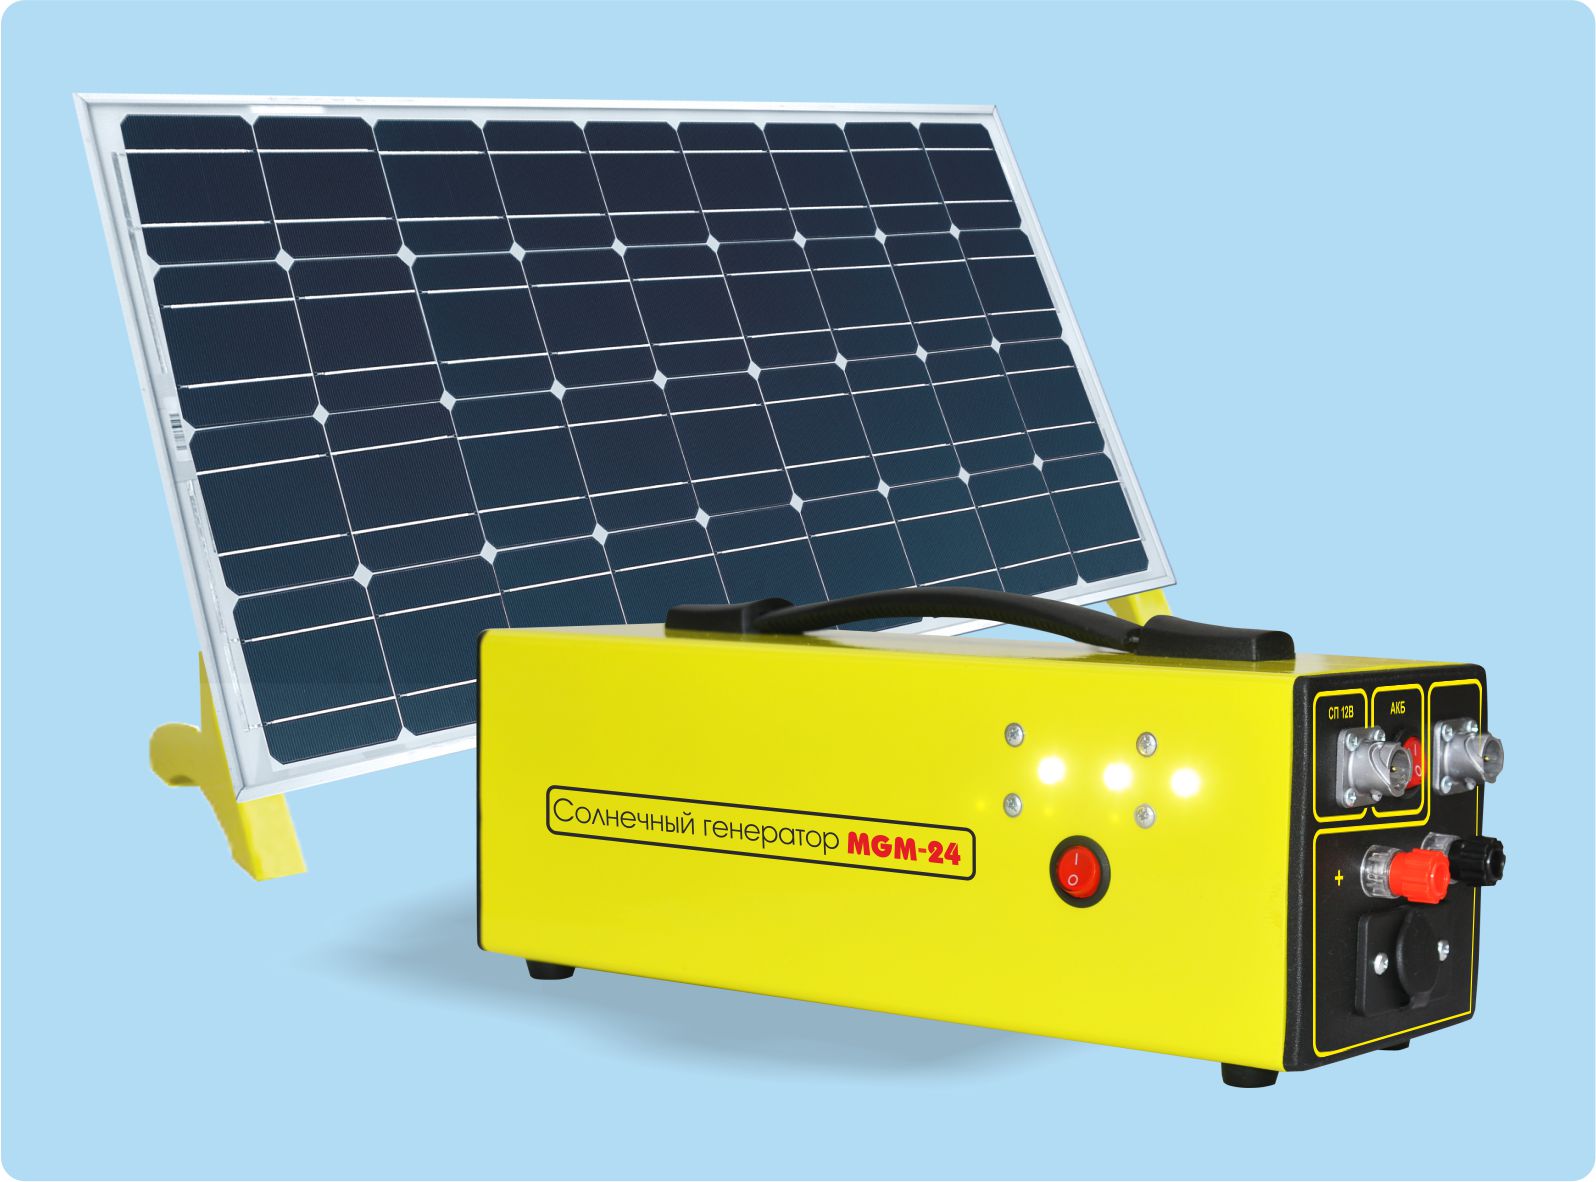
SE-10 (Lighting arbors, power alarms, cell phone charging)
|
|
Composition: 1. The solar battery 10W / 12V - 1 pc. 3. Battery 7Ah / 12V - 1pc. The cost for the set is 3500 rubles. This kit provides: 3. From of the light 4. Recharging car battery |
SE-60 (Lighting arbors, power alarm, charging a cell phone, powering the TV)
|
|
Composition: 1. Solar battery 60W / 12V - 1piece. 2. Charge Controller 10A / 12V - 1pc. 3. AKB 28Ah / 12V - 1 pc. The cost for the set is 10500 rubles. This kit provides work: 1. Car TV (12V) 2. Charge your mobile phone 3. From of the light 4. Charging the car battery 5. It is possible to connect the inverter 12V / 220V |
Solar power station for a small house SE-100 (Lighting arbors, power alarm, charging a cell phone, powering the TV)
|
|
Composition: 1. Solar battery 100W / 12V - 1 piece. 2. Inverter 400W / 12V - 1 piece. 3. The charge controller 10A / 12V - 1pc. 4. Battery 65Ач / 12В - 1 pcs. The cost for the set is 21000 rubles. 2.Energy saving lamps. 3. Charging your laptop |
|
The total load of electrical appliances connected at the same time should not exceed 300 W. (depends on the power of the inverter) |
|


Solar power station for a small house SE-500 (Lighting arbors, power alarm, small refrigerator, charging a cell phone, TV, laptop)
|
|
Composition: 1. Solar battery 230W / 24V - 2pcs. 2. Inverter 2000W / 24V - 1 pcs. 3. Charge Controller 20A / 24V - 1 pc. 4. Battery 65Ач / 12В - 2 pieces. The cost for the set is 75800 rubles. This kit provides autonomous operation: 1. Domestic household electrical appliances 2.Energy saving lamps. 3. Charging your laptop 4. A small refrigerator |
||||
|
The total load of electrical appliances connected at the same time should not exceed 2000 W. (depends on the power of the inverter)
Solar power station for a small house SE-700 (Lighting arbors, power alarm, small refrigerator, charging a cell phone, TV, laptop)
|
|||||
|
|||||


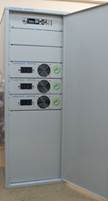
SES-1000. Energy-saving solar power plants are used for energy saving at housing and utilities facilities, for example, for lighting the approaches of residential buildings, and so on. It is intended for work of illumination in structure with light-emitting diode fixtures.
|
|
|
|
|
Composition: 1. Solar battery 240W / 24V - 4pcs. 2. The automated control unit with a charge controller -1pcs. 3.Inverter 2000VAA-1pc. 4. AKB 100A / h / 12V - 4pcs. 5. Cabinet for equipment -1pcs. 6.LED lighting 8W-80pcs. 7. Carcass of fixing solar batteries -1pcs. Installation or installation is possible. The complete set of solar power plants has a different design, depending on the power of the consumer and the customer's requirements. |
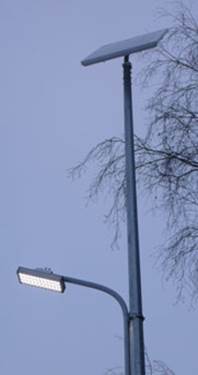
SEEA-100 Application of autonomous and energy-saving lighting systems.
Autonomous lighting of parks, highways of 3-category.
|
|
Within the framework of the company in the country to save energy and provide electricity to remote areas, it is advisable to use these systems to illuminate streets and roads, as well as territories adjacent to household plots. Thanks to the use of autonomous lighting systems - it is possible to increase energy saving up to 90%. Characteristics: Autonomous lighting system (AOS) - provides an independent from the presence of an external network illumination of yards, streets, roads and adjacent territories. As a light source, energy-saving lamps are used. The autonomous lighting system includes a solar battery, a charge / discharge controller and a battery. The equipment is housed in an iron casing on a pole. Typical technical characteristics of AOS: Rated power, 30/60 W Number of electric lamps, 1 or 2 pcs. Operating temperature, from minus 20 ° С to +60 ° С Autonomy time, from 10 h to 30 h The cost of the complex (AOS) is from 35000rub. |
|
The operating mode of the autonomous system is programmed as follows: 1. During the daytime, the accumulation of electricity in the battery from the solar panels through the charge / discharge controller. In this case, the light sensor prevents the lighting device from turning on. 2. With the onset of twilight, the light sensor gives permission to turn on the system |
|
Frame constructions for solar panels

An example of a frame structure.