Antipyretics for children are prescribed by a pediatrician. But there are situations of emergency care for fever, when the child needs to give the medicine immediately. Then the parents take responsibility and apply antipyretic drugs. What is allowed to give to infants? How can you bring down the temperature in older children? Which medications are the safest?
Lighting and light sources are now developing very rapidly. Engineering solutions are combined with design solutions and produce very interesting products. Changes also touched conventional light switches. A fairly common type, which is used in many apartments, is a switch with two keys. How to connect it correctly and in accordance with the required lighting functionality? The answer to this question will be considered in the article.
Advantages of a switch with two keys
Despite its simplicity, such a device can divide working areas in the apartment with the help of lighting. with two keys allows you to avoid setting individual buttons for each area, which is a good design decision.
It is worth noting that the connection of electrical objects to such a switch itself is simple, and does not require any special building knowledge. All that is needed is the availability of a standard tool, the desire and following the instructions described in this article.
Options for using a two-button switch
As noted above, such devices can control the lighting of two groups of light fixtures immediately. Depending on this, you can think over various options for:
- To save energy, the chandelier can be used not at full power, but only include a few light bulbs, if necessary.
- Control of two lamps by means of a single switch is now possible.
- Controlling lighting in different rooms from one place will not cause difficulties.
- Execution of special wishes - before visiting the bathroom, you can turn on the light with a switch in a certain room.
As you can see, the characteristics of switches with two keys can greatly simplify and improve the control of lighting. Nevertheless, the future sources of lighting and their scheme before installation should be carefully planned and even mark the main points on paper.
Planning future lighting
Before installing the switch, you need to take into account a lot of features: the nuances of the apartment, special ideas for future lighting, the location of the planned location of the light sources, the position of the switch itself, the location of the switchboard for powering the network.

When planning the lighting, a trace is created, in which the places of the cable laying are visible. This takes into account various obstacles, such as windows, heating pipes, various fastenings in the walls.
It is worth remembering about the cables that go to other consumers of electricity in the apartment. When designing the wiring diagram and before installing the circuit breaker, it is necessary to select a suitable wire cross-section, depending on the planned load of the electrical network. The insulation material must also be selected taking into account all the features of the wall and its material. Do not use self-propelled wiring that does not comply with the regulations. It is very dangerous to operate and can cause a fire.
Preparatory work for the installation of a switch with two keys
Installation of the circuit-breaker should begin with preparatory work. The first step is to determine the wires: which one is the phase and which one is zero. This procedure is best done with a special indicator. Professional electricians in this capacity is a special screwdriver with a light bulb in the handle. It will be needed in many electrical works, so it will need to be purchased. To determine the phase, you need to touch the metal part of the indicator to both wires. On which the light in the screwdriver will light up, that will be the phase. To avoid further confusion, the wires should be marked in some way.

When you should take care to de-energize the wiring that comes out of the ceiling. After ensuring the marking of the ceiling wires and you can begin to install a switch with two keys. But before this it is necessary to prepare connecting elements and electrical insulation, which are represented by the following varieties:
- self-clamping terminal;
- screw clamp;
- insulating tape or a cap made of silicone.
A set of tools for connection of a switch
For the correct connection of lamps in the chandelier, you need to carefully read the circuit diagram of the device. In the future it will allow to quickly eliminate any breakage during the use of the lighting device. For successful and safe work on the connection of any switch it is necessary to prepare the following tool:
- a set of different screwdrivers;
- knife or other tool suitable for stripping wires;
- pliers with side cutter.

It is standard It can be expanded depending on the conditions and degree of preparation of the site, as well as on what kind of a switch with two keys will be used. How to connect it and where to start the connection, is discussed below. First of all, you need to prepare the wires.
Preparation of electrical wires
The preparation of the wires differs depending on the types of electrical devices that need to be connected to the switch. If you are installing a chandelier with several bunnies, which emanate from a pair of wires, then the connection can be made depending on the wishes of the owner of the apartment.
In modern lighting devices, the preparation of wires, as a rule, has already been made at the factory by the standard connection scheme. If you need to make adjustments in the combination of connecting bulbs you have to do the chandelier dismantling.

Usually there are three wires in the installation box. The optimal length should be about one hundred millimeters. The ends of the wires need to be cleaned for a distance of about a centimeter.
If you connect a modular chandelier switch, which in its design has two separate keys, you need to think about feeding both of its parts. To do this, make a jumper from the wire that connects the two parts of the electrical device.
Preparatory stage of installation of the circuit breaker
The main rule of the work is a correctly designed circuit breaker with two keys and a way of connecting it to an electrical device. The neutral wire is always connected directly to the lighting device, and the phase is connected through the electrical circuit breaker. To fix the device in the wall, it is necessary to hollow out a puncher about eighty millimeters in diameter with a perforator. Then, the power is turned off with the switch in the switchboard. After that, you need to check the indicator by the absence of electricity on the wires, which is the main requirement for your own safety.
The wall is fastened to a jar with holes in it. Through them, wires are passed, which are then shortened with the help of wire cutters up to ten centimeters in length. The ends of the wires are peeled to a distance of one centimeter. If before was not defined and labeled, you need to do this at this stage. To do this, electricity is switched on again, the phase is detected with the help of the indicator, it is marked, and the power supply is switched off again.
Main Stage of Work
Then the main stage of work begins - when the key switch is directly connected to the lighting device. An electrical wire marked in advance as a phase is connected to the switch terminal with the letter "L". The remaining wires are inserted into the mounting holes with arrows. In the standard scheme, the phase is denoted by a residential white color, zero and grounding, respectively, in yellow and blue. To distribute the connection of different light bulbs on both keys, the connection of the wires in the terminals with arrows will be necessary.

At the end of the main stage of the work, electricity is supplied and the key switches are checked for lighting groups. If something does not work as intended, or does not work at all, it is necessary again to disassemble the entire system and check the conformity of the wires to specific light devices and the correctness of their connection to the switches.
Wiring diagram of the circuit breaker in the installation box
A double wire from the distribution panel is usually installed in the mounting box. In this case, the phase is marked in red, and zero is marked in blue. Two wires are also laid on each group of lighting devices from the installation box. In this case, the zero wire of each group is connected to the neutral conductor, which goes from the switchboard. The phase is connected to a wire of three cores, going to the switch. Following the scheme, the other two wires must be connected to the free ends of the wires, which are suitable for light devices.
For what in the breaker breaks the phase
The wire break with the phase is made primarily for the convenience of repair and replacement of burnt light sources. For this operation, it is enough only to disconnect the switch, and not cut down the power throughout the house.

When wires are confused and the neutral wire breaks, instead of the phase, standing on the floor or metal ladder, when touching a part of the cartridge connected to the phase and conducting an electric current, it is possible to get an electric shock. Therefore, you need to pay special attention to the preparatory operations and carefully mount the switch with two keys. How to connect it, is already known and should not cause any problems.
In carrying out any electrical work, first of all, you need to remember the safety precautions and strictly follow it. Following it, you can improve the electrical layout of any room and adapt lighting to specific tasks.
Finally
Thus, in our time, lighting can be customized to suit your needs and specific functionality. This became possible, thanks to the development of various electrical devices and the improvement of old developments. This article proves that you can flexibly control the light, and to help in this matter comes a switch with two keys. How to connect it and make the most of it is now known. It's a small thing - a great desire to change the lighting in your apartment or house in the best way.
The simplest device for direct switching on of light in a room is a one-button switch. Its installation will not be difficult for a technically savvy person if you follow the recommendations below.
To designate the planned channels for wiring, you need to know the principle of installing a switch. The scheme of its connection is not particularly difficult. The first and foremost rule: a single-key switch must interrupt the phase wire (usually brown or white). This is done for safety reasons, so as not to be electrocuted again.
Normally, the grounding is not used for ceiling lighting, but the earth wire is indicated on the diagram. The fact is that according to the rules of electrical safety this type of wiring is needed for wet rooms, and apartments are not such. However, the three-core cable with grounding wire will not be superfluous for the installation of dry room lighting.
Having studied the installation scheme, we draw the lines of cable laying in the most convenient way and start preparing for work.
Step-by-step instruction for connecting a single-key switch
Consider first the case with cables hidden in the wall without grounding. It is necessary to remember the main safety rule when installing any type of wiring - all work is done with the voltage off. That is, when starting to act, turn off the automatic device in the shield to save your own life and health.
Necessary tools and materials
It is clear that first of all you need to stock up the cable. Its required length can be determined by measuring with a roulette the drawn lines of electrical wiring. A 1.5 mm 2 wire is used for lighting. In addition to the cable must be prepared:
- switch;
- lamp;
- insulating tape;
- a standard glass (podrozetnik) for a wall-mounted appliance.
From the tools you will need the following:
- a perforator with a channel blade;
- screwdriver flat and cross;
- test-tester;
- pliers with insulated handles for safety;
- knife;
- crown on concrete with a diameter from a glass (6.8 cm);
- spatula and putty.
Preparatory work
Suppose the electrical wires for lighting the room are not summed up. First you need to decide where they can be taken. It is enough to find an electric box at the top of the ceiling in which the cabling of the apartment is hidden. Usually it is closed with a round plastic cover, the latter can easily be removed if you use a screwdriver.
 If the house is old enough, the junction box is likely to be twisted from aluminum wires, wrapped in black cloth tape
 Next, you need to determine the position of the future switch and find the center of the ceiling of the room. At the last indicated point, the lamp will be placed. In general, if there are no cables in the ceiling, they need to be brought. To do this, it is necessary to find in the electrical box the wires coming from the flap in the entrance.
To find a power line with a phase coming from the general network of the house, you need to take the help of a partner. The latter must go into the entrance and turn off each of the machines that feed the apartment. At this time, the second person sampler determines whether the electric current in the network has disappeared. When the tip of the screwdriver tester touches a bare wire with brown insulation, the indicator light must disappear. Usually from the entrance there is a thick cable, from it and we need to start checking.
The location of the switch is selected based on the convenience of pressing its key. That is, it is enough to choose a small height from 1 to 1.5 m from the floor and retreat from the door jamb some small distance (from 1 to 40 cm). The middle of the room can be determined using a tape measure, measuring the length and width of the room and dividing them in half. When these places are defined, you need to draw an imaginary cable line on the wall and ceiling with a pencil.
Sequence of cables and devices connection
A puncher will make a channel for the cable if the wiring is hidden. If an external network is planned, this power tool will not be needed, but plastic cable channels will be needed.

There are still types of switches that do not have bolts on the contacts. In this case, the bare ends of the wires can simply be inserted into the corresponding inputs, and the wires themselves are fixed by an automatic clamp. If you need to remove the ends back, you need to stick the tip of the slotted screwdriver into the special groove and press the mechanism.
If the cable is not fixed during the laying of the cable in the finished channel, special dowels must be purchased. They look like this: one end of the ring for the cable, the other - a common rod. Next, you need to drill several holes along the channel with the puncher and insert the dowels, fixing the cable with them.
 To fix the cable in the rod, you can use dowels with a special clip
 With open wiring, everything is much easier. The puncher is not needed. It is enough to lay the cable on the outside of the wall and attach it with any improvised elements, for example, the same dowels. But usually in this case, use decorative boxes for electrical wiring. The latter is simply glued to the wall on a double tape or fixed to self-tapping screws, and in them, after opening the lid, lay the wires. The rest of the process is the same as described above.
Video: connection of a one-button switch with indication
How to connect the switch from the socket
In this case, you can save on electrical wires. The connection is made in the usual order according to the script already described. However, the wires are not powered in an electrical box, but in an outlet.

Video: connection of the switch from the socket
How to connect three sockets and one switch from the box
Let's consider one more case. Suppose we need to supply three electrical sockets and one switch from the electrical distribution box. Then it's best to do so.

The cable for lighting is sometimes taken out of the box. Then we get two separate lines - one for sockets, the second for lighting. The switch is connected according to the original scheme described at the very beginning of the article.
Connection of a one-key switch to two light bulbs
It is also possible to configure a one-button switch with two lamps. In this case, the lighting units are simply connected in parallel.
For example, the phase wire coming from the switch can be put in a separate box. Inside its housing, insert the end of this wire into the terminal block or other wiring harness. And on the other side of such a contact group, two wires must be connected at the same time. These two phases must supply both lamps.
 For the "bifurcation" of wires you can use the universal Wago terminal block: an incoming cable is inserted into one connector, and in the remaining - two outgoing ones; This connection must be made on each of the three cores
 Another option: both wires from the illuminating devices should be inserted into one output of the switch. The disadvantage is that one of the ends in the process of exploitation can fall out of contact.
Video: how to connect a one-key and two-key switch
Usually the single-key switch serves for a long time. If the key stops snapping, it is better to replace the node completely. Modern switches are not easily repairable. Most often, such a malfunction occurs: one of the wires falls out of contact. Then you need to hit the key with a screwdriver, loosen the opened bolts, pull out the base, insert the contact into place and fix it. However, failures, as a rule, occur rarely, if equipment of well-known manufacturers is used.
A switch with two keys is a fairly popular device used in almost every apartment. With its help provide alternate and joint inclusion of light bulbs in the chandelier or separate lighting, for example, in two separate rooms or on the street and in the corridor. Some homeowners use it to connect the hood and light to the kitchen.
If the light is carried out on a balcony or a loggia with a double switch, you can avoid setting two separate buttons individually for each zone. Separation of premises into zones by means of illumination, as well as many other modern design solutions have become possible due to the connection of a simple electrical device - a switch with two keys.
It would be desirable to note that it is possible to connect any electrical elements to a double breaker to anyone who can handle a screwdriver. For this do not need to be a professional builder or be able to understand complex electrical circuits. All that is needed is a standard tool that will be found in the pantry of every economic person and, of course, desire.
First of all, you need to understand the wires, in other words, to find out which of them is zero, and which is the phase. For this need indicator - screwdriver with a light bulb in the handle, with the help of which this procedure will not cause difficulties. If the metal part of the indicator touches the phase conductor, then the LED will signal this, which will light up. It is important to mark the wires in any convenient way so that you do not get confused later on.
If a chandelier is connected, the first thing to worry about is the de-energizing of the wiring coming out of the ceiling. After the marking of the wiring is performed and the electricity is turned off, you can proceed to the installation of a switch with two keys. But before that you need to prepare the connecting elements and insulation for the wires, which are divided into the following types:
- self-clamping structure terminal;
- screw clamp;
- silicone cap or insulation tape, if the wires are connected with twists.
The most convenient and reliable way to connect wires is to fix them with self-clamping terminals. In turn, the use of screw clamps is less reliable, since such fasteners become weaker over time, and the insulation tape loses its elasticity.
For the correct connection of bulbs in the chandelier, it is important carefully read the circuit diagram of the device. This in the future will eliminate any breakage in the event of its occurrence during the operation of the lighting device. For proper and accurate work with your own hands, you need to have the following tool available:
- screwdriver Set;
- a construction knife or any other device for stripping wires;
- nippers or pliers with side cutters.
Naturally, this is the minimum set of tools and it can expand depending on whether there is a place for installing a switch with two keys or not, and whether it is possible to mount the chandelier, as well as other nuances that arise during the repair.
Features of preparation of electric wires
Based on the type of device connected to the mains, preparation of electrical wires may differ. If you install a chandelier with several lamps from which a pair of wires leaves, then the connection can be made depending on the preferences of the homeowner.
In modern lighting devices, wire preparation still on the conveyor of the plant, connecting them according to the standard scheme. Therefore, if there is a need to change the combinations, switching on the lamps will have to completely disassemble the chandelier.
In most cases, there are 3 wires in the installation box. It is desirable that they are not more than 100 mm in length. This size is enough to make a comfortable connection of the switch and the lighting device. At the ends of the wire need to be cleaned at a distance of 10 to 15 mm.
If a modular switch is connected, the design of which consists of two separately designed keys, it is important to worry about the nutrition of one and the other part of it. To do this, a jumper is made from a conventional wire, which connects both parts of the electrical device.
Installation of two-key switches - stages of work
The main rule of the work is a correctly designed circuit for connecting a two-button switch, which connects the zero wire directly to the lighting device, and phases through the electrical circuit breaker. To mount the device body into the wall, you need to drill a 70 cm diameter hole using a perforator. At the same time, when connecting a two-key switch model to an AC network, it is important to follow the basic steps of the work.
At the end of the installation work, the electric power is resumed in the switchboard and the conformity of inclusion of groups of lighting devices is checked with the switches.
Schemes for connecting a double breaker in a mounting box
In the installation box from the electrical distribution panel for the lighting group, in most cases a double wire is laid. In this case, the phase wire is usually indicated in red, and zero in blue.
From the installation box, wires with two cores are also laid on each group of light sources. In this case, the zero vein of each group is connected to the zero wire leaded from the switchboard. For convenience, it is permissible to use a serial connection scheme at the terminal closest to the customer's installation box.
The phase of the wiring coming from the switchboard is connected to the cable of three wires, which comes from the installation box to the switch with two keys. According to the scheme, the other two wires need to be connected to the free ends of the wires, suitable for light sources.
If the wires are connected not by clamps, but by twisting, they must be at least 4 cm in size. It is desirable to solder the contact groups and insulate with an insulating tape. At the same time, the circuit for connecting a two-button switch allows you to do all the work smoothly and quickly.
For what purpose, the breaker breaks the phase?
The phase wire is broken by the switch primarily for the safety of repairing the lighting device, for example, when replacing blown light sources. In this case, simply turn off the switch, and not turn off the electricity in the whole house.
If, however, to confuse the wires when connecting and perform a break with a switch of zero, and not phase, then, standing on the raw floor or aluminum ladder accidentally, touching the metal part of the cartridge connected to the phase will be electric shock. And the consequences of an electric shock or a fall from a high ladder should not be told, since it is clear that nothing good is expected in such a situation.
In this article we will consider in detail the question,. No need to rack your brains
to whom with this problem to address, where to get an electrician specialist. It is unnecessary to spend time searching and spending money on a call, everything is done easily and simply. You just need to follow the detailed instructions given in this article and the question how to install a light switch, will be solved without any difficulties and puzzles.
So, we have a new one-key switch and the desire to put it.
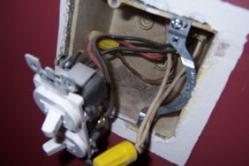
The installation site looks a bit dull for now, an empty pad and two wires sticking out of it, but this is only until we have installed a new switch.
Prepare the switch for installation
First of all, before carrying out all the work, it is necessary, using the voltage indicator (indicator), to determine the wire with the incoming phase. To do this, alternately, we bring it first to one wire, then to the next. We mark the required with the help of insulating tape.

Now, we turn off the electricity, check its absence on the wires, with the help and only after that we start to work.
There are a lot of varieties of switches. They differ: by manufacturers, by price category, by the quality of performance, by different methods of connecting wires to contact terminals and so on.
Let's consider two basic installation options. In the first case, we will install a switch of a cheap price category to 80 rubles.
We prepare the switch for installation, and for one we learn how the switch is arranged.

Using a flat screwdriver, remove the button of the switch, from the left or right side we cut it and detach it from the case.

Unscrew the two screws located diagonally on the protective frame, detach it from the mechanism.


The mechanism has four screws, two of the bottom are contact, they are designed to connect the wires to the mechanism. Two others drive the spacer mechanism, which is designed to securely fix the mechanism in the jar.

Contact screws.


Screws of the left and right spacer.


We untwist contact screws, on the upper end side we can see how the pressure plates move.

One of the contacts is coming, a phase comes to it, the other is going away, the phase goes to the lamp from it. On each contact there are two holes for connecting the wires. As the switch is arranged, we proceed to the next stage.
Switch connection
We clean the wires, remove the necessary amount of insulation, about 1 cm.

On inexpensive one-key switches, as a rule, there is no indication of the contacts coming and going, but just in case, look at the rear wall of the mechanism, the designations can be:
- digits 1 and 3 - here 1 contact of the incoming phase, 3 outgoing
- letter L and figure 1 - here L is the contact of the incoming phase, 1 is the outgoing
- the letter L and the arrow - here L is the contact of the incoming phase, the arrow is the outgoing
This is the most common notation.
We return to our switch. We insert the stripped wire into the hole, make sure that it is caught between the pressure plates, tighten the contact screw. We check how well the wire was fixed. It should not swing and stagger, if such a fact occurs, tighten the contact screw. A poorly stretched contact will burn and eventually lead to breakdown of the switch.
Do not overdo it, on switches of an inexpensive price category, tricks and carvings are not too reliable, it's very easy to disrupt.

The bare wire of the wire should stick out of the contact for 1-2 mm.

We insert and tighten the second wire.

We unscrew the screws of the spacer mechanism, insert the switch into the sub-socket, align it horizontally and fix it. We tighten the spacer screws and check the reliability of fastening the mechanism in the jar.

Install the protective frame, twist the diagonal screws, fixing it to the mechanism.

Set the key. Before installation, we look at the alignment of the pins and grooves of the moving part of the mechanism and the key.

This completes the connection of the switch.

Let us now consider the second version of the installation.
How to connect the light switch, second option
This option includes switches of expensive price category over 100 rubles apiece.
Prepare the switch for installation. In the course of the process, we look at his device.
These switches, as a rule, are not sold in full. The mechanism and the key together, and the frame separately. This is done to be able to apply a creative approach to designing a design of a switch, for example a white key, a black frame and so on at your discretion.
The switch key is removed very easily with your hands. We shoot.

Left and right are the screws of the spacer paws.


Turn the switch. The first thing that strikes us is the complete absence of screw, terminals and clamps. This category of switches has plug-in contacts, which are pretty well proven in lighting.

Let's consider closer. Switches of this class always have a legend.
In this case:
- L - contact for incoming phase conductor
- down arrow - outgoing wire contact
Each contact has two plug-in contact holes.

We clean the wires, remove 1 cm of insulation.


We stick the wires one by one into the contact.

The wire must go tight and rest. In this case it is allowed that the insulation of the wire protrudes from the contact by 2-3 mm. We check how the contact is tightened, try to pull the wire back, if at a certain effort (not with all the force) it does not stretch, the contact is good. We continue the connection of the switch.

Proceed to the next wire.

If there was a need to pull the wire out of the plug-in clamp and adjust the length of the stripped wire, press the lever specifically designed for these purposes.

We press and the wire is again free.

After connecting the wires, go to the installation of the mechanism in the sub-socket.

If your mechanism, without any difficulties, is installed in the existing podrozetnik and reliably there is fixed, then you have to put on the frame and set the key. But as a rule, in most cases the mechanism in the podrozetnik is not fixed, the spreading paws do not reach the edges of the podrozetnik, it is too large. TO how can I connect a light switch if this situation occurs? Let's figure it out.The fact is that before there were other standards and mechanisms of switches were more massive. Now the switches have become more compact, the mechanisms do not take up so much space in the junket, and the installation of the switch itself has undergone some changes in the sub-socket.Under the new, modern switches make the corresponding podrozetniki.

They are made now not from iron, as before, but from special non-combustible plastic.
Buying a new switch, you need to purchase a padding to it, basically they have a standard diameter of 67 mm.

When installing or repairing your home, you inevitably need to install or replace light switches. Such works are not particularly difficult and can be performed by a layman who has a clue about what the luminaire connection scheme is and what electrical safety rules should be adhered to when installing it. That's why before you start doing such work, you must first figure out how to connect the light switch.
The use of single-key devices is advisable in cases where it is necessary to organize switching of the wire through which one lamp or lamp receives power. If you need to connect a chandelier that has a large number of lamps in its composition, it is better to use a multi-key device. Another case in which it is more preferable to use two-or three-key switches is the situation when using such a device it is necessary to ensure the inclusion of bulbs in different rooms, for example, in the corridor, bathroom and toilet.
Necessary tools and materials
Before proceeding with the installation of a one-button switch, it is necessary to take care of the availability of such tools and consumables:
- Switch.
- Lamp with a lamp.
- Insulating tape.
- Knife for stripping insulation.
- Indicator screwdriver.

In the event that prior to the installation of the switching device the wiring is not made and the juniper is not mounted, you will have to stock up with such additional tools and materials:
- Alabaster.
- Junction box. This part is only needed when it is necessary to mount a new wiring in the room. Otherwise, you just need to find the nearest installed box and through it connect the lamp and switch.
- Punch.
- Capacity for mixing putty.
- Bulgarian with a circle of concrete.
- Ladder.
- Putty knife.
- Wires.
By the method of installation, there are two types of such devices: internal and invoice. Their principle of operation does not differ and consists in the fact that when the button is pressed, the electrical circuit is closed or opened.

The product of the overhead type is used mainly in premises with wooden walls. Its main advantage is the ultimate simplicity of installation. Such a device can easily be used as a temporary switch, which is installed in order to avoid large-scale repair work, fraught with large financial costs.
The built-in model certainly looks more compact and aesthetically attractive than its previous counterpart. However, for its installation it is necessary to provide concealed wiring. Such work involves the need to shroud walls for laying electrical wires, which is fraught with a lot of dust and damage to the walls. That is why the installation of integrated outlets and switches try to combine with the performance of repair work in the apartment.
The one-key switch consists of the following main parts:
- Working mechanism. It is the main part of the device. It includes a key actuator mounted on a metal frame. To mount the entire structure in the jar, the frame has a pair of extendable legs. Connection of electric wires is carried out through special contacts. Installation of the working mechanism is carried out in the same way as.

- Plastic key. It is useful for making the contacts of the device turn on and off.
- Decorative frame. This element is made of dielectric material and also performs the function of protection from electric shock. The frame can be attached to the main part by means of plastic latches or metal bolts.

A slightly more complicated device is a switch with a backlight, which has an undeniable advantage - it is perfectly visible in the dark. This function not only saves the person from the need to fumble in the dark in search of a switch, but also makes it possible to use this device as a kind of night light.
There are also modular and waterproof switches. Modular devices are designed for installation in a cable channel and are used mainly for connecting luminaires in office premises. As for waterproof models, their use is advisable in rooms with high humidity, for example, in bathrooms, bathrooms or outdoors when connecting outdoor fixtures.
Connection scheme for one-button switch
The main rule that must be observed when installing switching devices is the need for their installation on the phase conductor. In other words, when you turn off a lamp, a lamp, or another consumer using this device, the phase disappears at its input. This gives a guarantee of protection against accidental electric shock in the event of a breakdown in the insulation of the electrical wiring or when touching open live parts.
If the circuit breaker is connected correctly, when it is disconnected, you can change the burned bulbs without any risk and perform maintenance work on the luminaire.
Installation of the light switch is performed according to the scheme shown in the figure.

As can be seen from the diagram, there is no difficulty in correctly connecting the light switch. The figure also shows the ground wire, which goes through the junction box to the luminaire. In electrical wiring of old buildings such a conductor may be absent.
For the correct connection of the wires in the junction box, it is better to check once again that the conductor going through the switch to the luminaire is just phase. This is most easily done using an ordinary indicator screwdriver.
Somewhat more complex is the through circuit of connecting a single-key switch, which is used to provide ease of use of lighting, for example, in long corridors or for connecting outdoor fixtures. Using this circuit, it is possible to ensure the switching on and off of such luminaires by means of two switches located in different places.
![]()
As can be seen from the diagram, it provides two different paths of current passing through two circuit-breakers installed in the circuit. The power supply of the luminaires is carried out only if the contacts of the switches close the conductors of the same branch. This can be done by changing the position of the keys of any of them.
The order of the installation works
Before installing the circuit breaker, it is necessary to lay the electrical wires connecting the lamp, the junction box and the switch itself.
If the device is built-in type, it is necessary to pre-install the sub-socket, releasing about 10 cm of wire from it. This should be done for the convenience of connecting the wire to the switch contacts.

Installation of the receptacle (box) is carried out in the same way as in the case of connecting an electrical outlet. After drilling a hole in the wall, the podzoetnik is fixed in it with the help of alabaster.
If all the preparatory work is already done, then you can proceed to install the switch.
Step-by-step instructions on how to install the one-key switch correctly are as follows:
- Disconnect the power supply. This can be done with the help of an automatic device or plugs located on the lead-in shield.
- Remove the key. It is fixed to the elements of the working part with the aid of plastic slots. Therefore, this element can be removed with your fingers without much effort.
- Remove the protective frame, which in most cases is attached to the operating mechanism with two screws.
- Clean the ends of the wires, intended for connection to the switch terminals, from the insulation. If the working part of the device provides for connecting the wires with a bolted connection, then approximately 1 cm of each wire should be isolated from the insulation. In the event that self-clamping contacts are used, it will be sufficient to have 0.5 cm.
- Connect the wire ends to the switch contacts. In doing so, care must be taken to ensure that they are correctly connected in accordance with the marking of the contacts. Many models of these devices use the designation L or 1 for the incoming and 3 or the arrow for the outgoing wire. When tightening the bolts, you must calculate the force in such a way as not to damage the contacts. This is especially true for low-cost switch models. It should also be noted that under the bolts there should be no wire insulation, as this can lead to overheating and even destruction of the connection points.
- Install the working mechanism in the jar. For this, sliding feet or special screws are used. When installing such a device, it is important not to interchange the top and bottom of the unit. The correctly installed switch is in the on position when you press the top of the key. To determine at which of the states of the working mechanism the circuit closes, it is sufficient to make several test inclusions and trips. To activate the mechanism, you need to apply some effort, and when you turn it off, it is enough to touch the key lightly - a special spring helps to break the electrical connection faster.
- Install the protective frame. To achieve the correct position of the frame, you can use the building level.
- Set the key.
When installing a switch with backlighting, all work is carried out in the same way as when connecting an ordinary device. The only difference is the need to connect a small electrical circuit, consisting of a current-limiting resistor and a neon light or LED, to the switch's contacts.
The principle of this backlight is quite simple. Due to the large resistance of the resistor when the switch contacts are closed, the electric current practically does not pass through the LED. But when the working contacts of the circuit breaker open, the illumination circuit becomes the only way through which current can flow.