Antipyretics for children are prescribed by a pediatrician. But there are emergency situations for fever when the child needs to be given medicine immediately. Then the parents take responsibility and use antipyretic drugs. What is allowed to give to infants? How can you bring down the temperature in older children? What medicines are the safest?
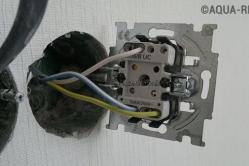
In the process of repair, you have to remove partitions, break walls or move sockets and switches. This is not an easy job. Electric cables are laid inside the walls under the plaster and an accident can occur if not done correctly. Even the usual hanging of bookshelves is dangerous without first locating the cable runs. Having wiring diagrams, one cannot be sure that they are true, because the previous owner could independently change the wiring without noting it in the diagram.
That is why it is imperative to determine the location of the cables. Now on sale there are quite a few devices for detecting hidden electrical wiring, but the price sometimes bites. Sometimes it is better to use ready-made schemes for hidden wiring searchers, and do everything with your own hands, having received the device you need on the farm.
The simplest indicator
The first option is the simplest indicator of hidden wires. Necessary materials for its manufacture with your own hands:

We wind the wire onto the magnetic circuit, solder the ends to the cable, insulate it, insert the connector into the microphone input and do-it-yourself hidden wiring finder was made in about half an hour. Turn on the maximum volume, drive the coil over the search surface. By changing the sound, we find the place where the hidden cable is laid.
Single transistor detector
The following scheme was developed by V. Ognev from Perm. The finder uses a feature of a field-effect transistor, it is very sensitive to the slightest interference. When aiming at its shutter, the channel resistance changes. This results in a strong change in the current flowing through the phone, resulting in a change in sound. The phone must be high-resistance with a resistance of 1600-2200 ohms, a battery with a voltage of 1.5 - 4.5 volts, the polarity of its connection does not matter.

When searching for hidden wiring, the device is driven along the wall and the location of the wire is found by sound power. Instead of a phone, you can use an ohmmeter with a built-in power supply, then a battery is not needed.
Three transistor detector
The wiring detection device is made on the basis of three transistors, two bipolar KP315B and one field KP103D. A multivibrator is assembled on KP315B, and an electronic key on KP103D. The circuit diagram of the hidden wire detector was developed by A. Borisov.
The principle of operation is the same as in the second version, only a multivibrator with light indication is used instead of a telephone. When the detector is turned on and in the absence of interference on the antenna probe, the LED does not light up. When radiation appears in the area of the probe, the field-effect transistor closes, thereby starting the multivibrator and the LED starts to flicker, indicating the presence of electrical wiring.
The parts used are in accordance with the diagram, the push-button switch is KM-1, the power source is any battery or accumulator with a voltage of 6-9 volts.

You can use a plastic soap dish or a school pencil case as a finder body. The blinking frequency of the LED can be adjusted by changing the characteristics of the multivibrator, changing the values of the resistances R3, R5 or capacitors C1, C2.
Wiring detector on two digital microcircuits
The hidden wiring detector circuit developed by G. Zhidovkin is very simple.

Composition: 2 digital microcircuits, ZP-3 piezoceramic emitter and 9 V battery. The role of the antenna is played by a piece of copper wire 10-15 cm long and 1-2 mm in diameter.
The induced oscillations from the electromagnetic field of the wiring lead to a change in the output signal of the K561LA7 input to the K561TL1 input with Schmitt triggers. As a result, a characteristic crack is heard, signaling the presence of a cable.
Device based on K561TL1
Unlike the previous version, the wiring finder based on K561TL1, in addition to the sound alarm, has a light indication.
The essence of the work is as follows. When the antenna is brought to a current-carrying wire, an electromotive force with a frequency of 50 Hz is induced in it. This signal is fed to the operational amplifier, then to the LED and the input of the K561TL1 microcircuit with a piezoceramic emitter at the output. This causes the audio frequency generator to start and the LED to flicker.
The finder is economical, the maximum current with the included indicator is 6-7 mA.
The antenna is made of one-sided foil fiberglass 55×12 mm in size. The initial sensitivity is set by the variable resistor R2. With proper installation, the device, developed by S. Stakhov (Kazan), does not need to be adjusted.
Universal wire detector
You can make a universal hidden wiring indicator with your own hands, provided that you have some skills in drawing up radio circuits.
The detector contains two independent blocks: a detector of hidden wires under voltage and a metal detector. This allows you to detect wiring when it is laid in steel sleeves or when there is no mains voltage. Additionally, the detector searches for and finds old de-energized wiring, fittings, nails and other metal objects.

The detector is based on two KR140UD1208 operational amplifiers. The concealed wiring finder unit is practically the same as the previous device, only without an audible alert.
Block metal detector works as follows.
A high-frequency generator is assembled on the KT315 transistor, which, with the help of a variable resistance R6, is entered into the excitation mode. The generator output signal is rectified by the KD522 diode and puts the comparator assembled on the KR140UD1208OU operational amplifier into a state when the audio signal generator assembled on the K561LE5 digital microcircuit is in standby mode and the LED goes out.
By rotating the variable resistance R6, the operating mode of the KT315 transistor changes so that it is at the generation threshold. Status monitoring is carried out using a light indicator and a sound signal generator. They must switch off. To detect hidden wiring, you need to bring the device to the wall, when the antenna (inductors L1, L2) approaches the metal, the magnetic field changes, generation is disrupted, the comparator starts, the LED lights up. The piezo emitter begins to emit a sound with a frequency of 1 kHz.
Small metal detector
The detector is designed to search for hidden wiring, fittings and other metal objects.
 The main difference from previous models is that you do not need to wind the inductors yourself. Instead, a relay winding is used. The operation of the searcher is based on the task of isolating the difference frequency of two generators, when, when approaching a metal object, one search generator (LC) changes its oscillation frequency.
The metal detector includes LC and RC generators, a buffer stage, a mixer, a comparator and an output stage.
The frequencies of the RC and LC generators are selected to be approximately the same, then, after passing through the mixer, the output will already have three frequencies. The third is equal to the frequency difference between RC and LC circuits.
The low-pass filter subtracts the difference frequency and sends a signal to the comparator, where a meander of the same frequency is formed.

From the output element, the meander through the capacitance C5 enters the telephone, whose resistance should be approximately 0.1 kOhm. Since the capacitance and active resistance of the phone form a differentiating RC circuit, an impulse will form on the rise and fall of the meander. As a result, a person will hear clicks with a frequency twice the difference.
Detection of hidden wiring will be detected by a change in the frequency of the sound. The coil is taken from the RES 9 relay, while the moving elements are removed.
Since the relay contains 2 coils with different cores, the common terminals of the windings must be connected to the capacitance C1, and the core and the variable resistance housing must be connected to a common bus.
As a printed circuit board, a double-sided foil getinax or fiberglass is used. Finder parts should be placed on one side, the other side does not need to be etched, it must be connected to the common bus of the device.
On the second side, a battery is fixed, an inductor from a relay.
 The board is installed in any non-metallic case where the phone connector is attached. Adjustment of the metal detector begins with adjusting the frequency of the LC generator by selecting capacitance C1. The frequency should be in the range of 60-90 kHz.
Then we change the capacitance of the capacitor C2 until the sound appears in the phone. When adjusting the resistance in different directions, the sound should change.
Depending on the setting, the frequency will change and the detector will sound like it is searching for a radio station. The closer the metal, the louder the sound. The tone depends on the type of metal.
Non-standard ways
Finally, it is worth describing a couple of unusual devices for finding hidden wiring, which even people who do not have knowledge of electronics can make. If the house has an ordinary compass, then this is a ready-made wiring indicator. Before use, the wiring should be properly loaded, and by the deviation of the compass needle, look for the location of the wire.
The second method is more effective, it also uses the power of the magnet. A permanent magnet is attached to a piece of thread, preferably neodymium, and slowly drawn along the wall. Where the cable or fittings will pass, the magnet will deviate. This happens due to the generation of a magnetic current by an electric current. So elementary knowledge of the physics of magnetic phenomena helps.